Setting up a new Plan allows you to establish your Client Plans and Prospect/Sample Plans. Once your Plan is created you can tie it to a Customer or Prospect.
Plan Setup is a quick, multi-step process. Start with Plan Info below if you're getting started with a new Plan, otherwise use the links below to jump to a section in this article.
- 1
-
Plan Info
- Access the Plan List screen by clicking "Plan List" in the navigation menu at the top of the page.
- Click the Add Plan button in the upper right-hand corner of the screen. You will arrive on the Plan Info screen.

- Complete the Plan Information section. For this and other sections on this screen, Required Items have a red asterisk next to the field.
- Recordkeeper Plan ID and LPL Account Number is necessary to use the Branchnet import process for loading Plan line-up and asset data.
- For Plan Type select Client or Prospect/Sample.
- Complete the Services section.
- Fiduciary Status will customize the compliance and services information you will be asked to provide in the step below, and will customize your Investment Policy Statement when you create it in the toolset.
- Complete the Scoring Methodology section.
- LPL 12 Point is LPL's proprietary scoring methodology and is what the majority of LPL member firms utilize.
- Custom Scoring allows you to pick up to 12 evaluation criteria to score the funds in your plan.
- Optionally for Custom Scoring, Score Weighting allows you to assign points (out of 100) to each criteria and place more or less emphasis on selected evaluation criteria. This produces a fund score out of 100.
- Click SAVE on the right-hand side of the screen.
Your Plan is now created! Now we need to set the Fund Evaluation Criteria for the Plan. See step 2 below.
- 2
-
Fund Evaluation Criteria
FirmPlus allows you to configure the Fund Evaluation Criteria for your plan. You can configure your Evaluation Criteria on a Plan basis as well as save/load Defaults for quick setup.
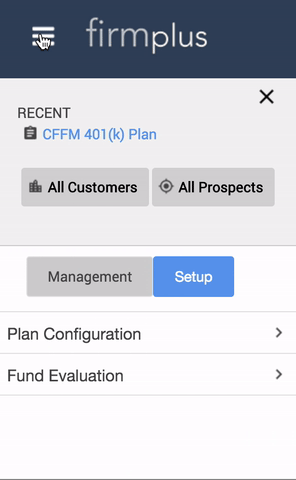
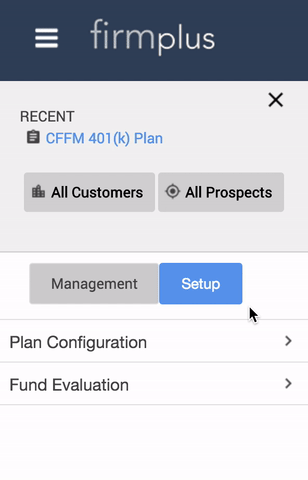
- Click the hamburger menu icon in the upper left-hand corner. The Plan Management menu will slide in from the left. In the menu click the Fund Evaluation option, the menu will expand. Click either LPL Scoring or Custom Criteria (based on your Scoring Methodology selection you made when setting up the Plan).
-
If you're using LPL Criteria, your criteria options will be chosen for you automatically. If you're using Custom Criteria, select up to 12 Evaluation Criteria by clicking the drop-down box for the criteria you wish to use and selecting a threshold option.
-
At the bottom of the screen set the Scoring Threshold. This defines how many of the selected Evaluation Criteria need to be met for a fund to be considered "Passing".
-
Click SAVE in the upper right-hand corner to save your selections.
Your Plan's Fund Evaluation Criteria are now saved! The last step is to set up the Fund Lineup for your Plan. See step 3 below.
- 3
-
Fund Lineup
- Firm-Plus offers many ways to create the fund line-up for your Plan. The Fund Lineup screen allows you to setup your investment line-up, enter fund assets, search for replacement funds, enter fund commentary, enter Plan fee data, and many other activities.
- Click the hamburger menu icon in the upper left hand corner. The menu will slide in from the left. In the menu click the Management toggle option. Click the Investment Management option, the menu will expand. Click Fund Lineup.
- On the Fund Lineup screen, enter the funds in your Plan. The are many ways to do add funds to your plan -- the following steps cover the simplest method:
- Click the blue Quickload button near the top of the screen.
- On the Fund Ticker Load screen enter the tickers of the funds in your lineup in the open text box.
- Manually type in Ticker Symbols, separated with a comma or space.
- Copy and paste tickers in from a spreadsheet or document.
- If you don't know the ticker symbol of the fund(s) you are attempting to add (or it doesn't have a publically available ticker symbol) click on the Lookup link to search for the fund. The Ticker Lookup window will open.
- In the Ticker Lookup window you have filter options available to help you locate the fund you are searching for.
- Legal Type is a required setting and allows you to search within a specific universe of funds
- Vendor Filter allows you to optionally utilize an investment Product Platform to search for investments (e.g. you are searching for a fund for a plan that is currently on the Voya Map Select platform)
- Search allows you to search for a keyword (e.g. part of the fund name or fund family name).
- You are required to enter a phrase in the Search area. If you are wishing to search an entire Vendor Filter list, you can enter one space (one click on the space-bar on your keyboard) in the Search area. This will cause all funds currently in the Vendor Filter list to appear in your search results.
- When your search results populate, click on the Add button for each fund you want to add to your plan. This will add the ticker(s) to the Fund Ticker Load screen in the background.
- When finished, click the Close button.
- In the Ticker Lookup window you have filter options available to help you locate the fund you are searching for.
- Set the Fund Status for the funds you are adding to your plan. In the Add As area, select a Fund Status button from the drop-down list. A legend is above the drop-down list which defines each Fund Status option.
- Click the Submit button.
- A confirmation message will appear confirmed your funds have been added.
- Click the Return to Fund Lineup. You will return to the Fund Lineup screen and the funds you added will now be visible.
- For each fund in your Fund List enter the Fund Assets in the Assets column for each fund.
- When finished entering Funds and Fund Assets, click on the Save button in the upper right-hand corner.
Your fund lineup and fund assets are now setup and saved!
Congratulations on setting up your Plan!
You are now ready to generate an Investment Monitoring report.